
Introduction: Why Your IPTV System Is Only as Good as Its Encoder
Imagine launching a professional IPTV service — hotels, hospitals, stadiums, or a full broadcast network — only to discover your streams are buffering, out of sync, or dropping entirely. The culprit? A weak or misconfigured encoder at the heart of your headend.
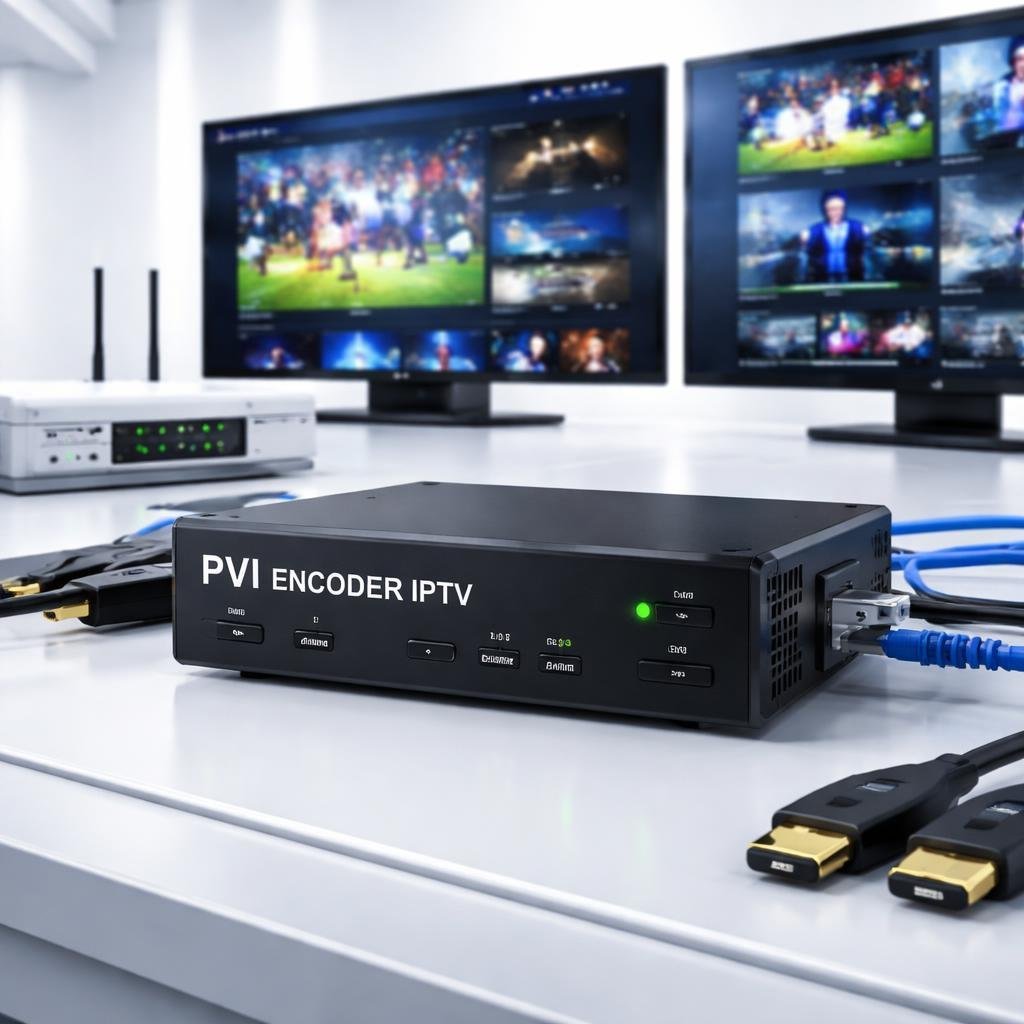
If you’ve been researching pvi encoder IPTV solutions, you’re already asking the right question. The encoder is the backbone of any IPTV system. It converts raw video signals into compressed, network-ready streams that can be delivered to thousands of screens simultaneously. And among the professional-grade options available today, PVI encoders have earned a strong reputation for reliability, versatility, and broadcast-quality performance.
This complete guide covers everything you need to know about PVI encoder IPTV technology — from how it works and what makes it stand out, to step-by-step setup instructions, real-world use cases, troubleshooting tips, and expert best practices. Whether you’re building your first IPTV headend or scaling an existing deployment, this is the resource you’ve been looking for.
H2: What Is a PVI Encoder in IPTV?
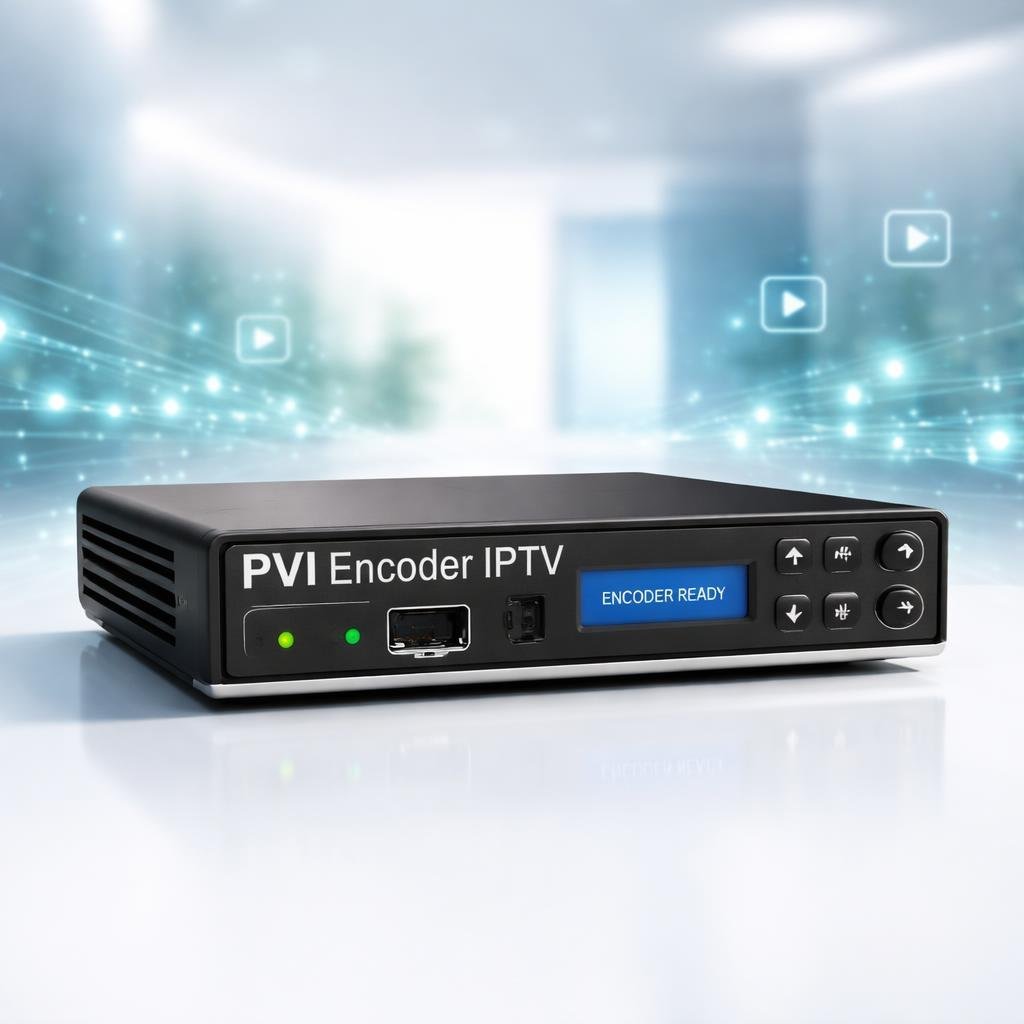
A PVI encoder is a professional hardware or software-based video encoding device manufactured and distributed under the PVI (Professional Video Integration) product line. In the context of IPTV, it serves as the critical first stage of the content delivery chain — taking in raw or baseband video signals and converting them into compressed digital streams suitable for IP network transmission.
In simpler terms: the encoder is what transforms a live satellite feed, camera output, or broadcast signal into the H.264, H.265, or MPEG-2 data stream that your IPTV middleware and set-top boxes can actually use.
PVI encoders are specifically designed for:
- Professional IPTV headend environments
- Multi-channel live TV broadcasting over IP networks
- Hotel, hospital, and enterprise in-building TV systems
- Video-over-IP deployments in education and government facilities
- OTT (Over-the-Top) streaming platforms
Unlike consumer-grade encoding tools, a PVI encoder IPTV device is engineered for 24/7 continuous operation, low-latency output, and multi-channel simultaneous encoding — features that are non-negotiable in professional broadcast environments.
Quick Definition (Featured Snippet): A PVI encoder in IPTV is a professional video encoding device that compresses live video signals into IP-compatible digital streams (H.264/H.265/MPEG-2) for distribution across local networks or the internet via IPTV infrastructure.
H2: How PVI Encoders Work — The Technical Breakdown
Understanding how a PVI encoder streaming device works helps you configure it correctly and troubleshoot issues faster. Here’s the full signal chain:
H3: Step 1 — Signal Input
The PVI encoder accepts incoming video signals through one or more input interfaces. Common supported input types include:
- HDMI — from cameras, computers, or AV equipment
- SDI (Serial Digital Interface) — professional broadcast standard
- CVBS / Composite — legacy analog signal input
- Component (YPbPr) — higher-quality analog
- ASI (Asynchronous Serial Interface) — for receiving pre-encoded transport streams
The input signal may be live video from a camera, a satellite receiver output, a cable TV signal, or a pre-recorded source.
H3: Step 2 — Analog-to-Digital Conversion (ADC)
If the input is analog, the encoder’s internal ADC converts it into a raw digital format. This uncompressed digital video is extremely large in size — a single second of uncompressed HD video can exceed 1 GB — so it must be compressed before transmission.
H3: Step 3 — Video Encoding / Compression
This is the core function of the PVI encoder. It applies a codec (compression algorithm) to dramatically reduce file size while maintaining acceptable video quality. Supported codecs typically include:
- H.264 (AVC) — the most widely used codec, excellent balance of quality and compression
- H.265 (HEVC) — up to 50% better compression than H.264, ideal for 4K
- MPEG-2 — older standard, still widely used in legacy IPTV and DVB systems
- MPEG-4 — transitional codec between MPEG-2 and H.264
H3: Step 4 — Multiplexing into Transport Stream
The compressed video, audio, and metadata are combined into an MPEG-TS (MPEG Transport Stream) — the standard container format for IPTV broadcasting. This transport stream can carry multiple programs simultaneously (Multi-Program Transport Stream, or MPTS).
H3: Step 5 — IP Output and Network Delivery
The encoded transport stream is output via the encoder’s IP interface using protocols such as:
- UDP (User Datagram Protocol) — low-latency multicast streaming
- RTP (Real-Time Transport Protocol) — adds timing and sequencing information
- RTSP (Real-Time Streaming Protocol) — for on-demand and unicast streams
- HLS (HTTP Live Streaming) — for OTT and web-based delivery
- RTMP (Real-Time Messaging Protocol) — for platforms like YouTube Live or Facebook
The stream is then passed to an IPTV middleware, headend server, or directly to a multicast-enabled network switch for distribution to end-user devices.
H2: Key Features and Benefits of PVI Encoder IPTV Devices
Here’s why professionals consistently choose PVI encoder IPTV hardware for their deployments:
H3: 1. Multi-Channel Encoding in a Single Unit
One of the defining features of PVI encoders is the ability to encode multiple channels simultaneously from a single rack-mounted device. Depending on the model, a single unit may handle 4, 8, 16, or even 32 channels concurrently — dramatically reducing equipment costs and rack space in large deployments.
H3: 2. Broadcast-Grade Video Quality
PVI encoders support high-definition and ultra-high-definition encoding up to 1080p Full HD and 4K UHD, with advanced rate control algorithms (CBR, VBR, CVBR) that maintain consistent quality even during complex scenes or high motion content.
H3: 3. Low-Latency Performance
For live broadcasting applications — sports, news, events — latency matters enormously. PVI encoder streaming devices are engineered to deliver sub-second to single-digit second latency, keeping live content as close to real-time as possible.
H3: 4. Wide Protocol and Format Support
Professional deployments demand flexibility. PVI encoders support a broad range of input formats and output protocols, including:
- Input: HDMI, SDI, CVBS, ASI, IP
- Output: UDP, RTP, RTSP, HLS, RTMP, HTTP
- Codec: H.264, H.265, MPEG-2, AAC, MP3, AC3 audio
H3: 5. Redundancy and Reliability Features
For mission-critical broadcasting, PVI encoders often include:
- Dual power supply options for failover protection
- Automatic stream recovery if network interruptions occur
- Watchdog timers to detect and restart frozen streams
- SNMP monitoring for remote network management
H3: 6. Web-Based Management Interface
Configuration and monitoring are handled through a clean web-based GUI accessible from any browser — no proprietary software installation required. This simplifies remote management across distributed deployments.
H3: 7. Scalability
Whether you’re starting with a single-channel encoder or scaling to a full 100-channel IPTV headend, PVI encoders fit within a modular architecture that grows with your infrastructure.
H2: PVI Encoder IPTV Setup — Step-by-Step Guide
Setting up your IPTV encoder setup correctly from day one prevents most of the problems operators encounter later. Follow this structured walkthrough:
H3: Prerequisites Before You Begin
Before touching the encoder, make sure you have:
- A stable IP network with multicast support enabled (IGMP snooping configured on your switches)
- A valid IP address range assigned for streaming traffic
- Your video source ready and connected (camera, satellite receiver, cable box, etc.)
- Access to your IPTV headend server or middleware platform
- A computer on the same network to access the encoder’s web interface
H3: Step 1 — Physical Installation and Connections
- Mount the PVI encoder in your server rack or place it in a secure, ventilated location.
- Connect your video source cable to the appropriate input port (HDMI, SDI, or CVBS).
- Connect the encoder to your network switch using a Cat5e or Cat6 Ethernet cable.
- Connect the power supply and power on the device.
- Wait for the unit to complete its boot cycle (typically 30–60 seconds).
H3: Step 2 — Initial Network Configuration
- Most PVI encoders ship with a default IP address (commonly
192.168.1.x). Check your manual. - Set your computer’s network adapter to the same subnet (e.g.,
192.168.1.100). - Open a web browser and navigate to the encoder’s default IP address.
- Log in using the default credentials (typically
admin/admin— change this immediately). - Navigate to the Network Settings section.
- Assign a static IP address that fits your network scheme.
- Set the correct subnet mask, default gateway, and DNS server.
- Save and reboot the encoder.
H3: Step 3 — Configure Video and Audio Input
- Navigate to the Input Settings or Encoder Settings section in the web UI.
- Select your input source type (HDMI, SDI, CVBS, etc.).
- Set the input video standard:
- For HD: 1080i/59.94, 1080p/25, 720p/50, etc.
- For SD: PAL (625i/50) or NTSC (525i/59.94)
- Configure audio input — select embedded audio (HDMI/SDI) or external analog audio.
- Set audio sample rate (typically 48 kHz) and bit depth (16-bit or 24-bit).
H3: Step 4 — Configure Encoding Parameters
This is the most critical step. Wrong encoding parameters lead to poor quality, high bandwidth consumption, or compatibility issues.
Recommended encoding settings for standard IPTV:
| Parameter | SD Recommended | HD Recommended |
|---|---|---|
| Codec | H.264 | H.264 / H.265 |
| Resolution | 720×576 (PAL) | 1920×1080 |
| Video Bitrate | 1.5–3 Mbps | 4–8 Mbps |
| Frame Rate | 25 fps (PAL) / 30 fps (NTSC) | 25 or 30 fps |
| Rate Control | CBR | CBR or VBR |
| GOP Size | 25–50 | 25–50 |
| Audio Codec | AAC | AAC |
| Audio Bitrate | 128 kbps | 192 kbps |
| Profile | Main | Main or High |
H3: Step 5 — Configure Output Stream
- Navigate to Output Settings or Streaming Settings.
- Choose your output protocol:
- UDP Multicast for IPTV LAN distribution (most common)
- RTP if your middleware requires it
- HLS for OTT/web delivery
- Set the multicast IP address (valid multicast range:
224.0.0.0to239.255.255.255). - Set the destination port (e.g.,
1234or any available UDP port). - Set the TTL (Time To Live) value —
5to15is typical for LAN deployments. - Enable IGMP if required by your network.
- Save settings and start the stream.
H3: Step 6 — Verify the Stream
- Use VLC Media Player on a computer in the same network to test the stream.
- Open VLC → Media → Open Network Stream → enter
udp://@239.x.x.x:1234. - Confirm that video and audio are playing correctly.
- Check the encoder’s status page for any error indicators or dropped frames.
- If using IPTV middleware, add the stream URL to your channel list and test on a set-top box.
H3: Expert Tips for IPTV Encoder Setup
- Always use CBR (Constant Bit Rate) for IPTV over managed networks — it ensures predictable bandwidth usage.
- Set your GOP (Group of Pictures) size equal to your frame rate for one-second keyframe intervals, which improves channel switching speed.
- Enable low-latency mode if your encoder supports it for live sports and news channels.
- Use a dedicated VLAN for streaming traffic to isolate it from general network traffic and prevent congestion.
- Always document your multicast IP assignments to avoid address conflicts as you scale.
H2: Real-World Use Cases for PVI Encoder IPTV
The hardware IPTV encoder market serves a remarkably wide range of industries. Here’s where PVI encoders deliver the most value:
H3: Hotel and Hospitality IPTV Systems
Hotels deploy PVI encoders to convert satellite or cable TV signals into an IP-based TV system that serves every guest room. A single 16-channel encoder can replace an entire analog cable distribution system, delivering HD channels to hundreds of rooms with centralized management.
Key benefit: Centralized control from the front desk — add channels, block content, or push welcome messages without touching hardware in individual rooms.
H3: Hospital and Healthcare Facility TV
Hospitals use IPTV systems powered by hardware IPTV encoders to deliver patient entertainment, health education content, and real-time information across all rooms and waiting areas. PVI encoders enable secure, managed delivery with the reliability required in medical environments.
H3: Streaming Businesses and OTT Platforms
Small to mid-size OTT operators use PVI encoder streaming hardware to ingest live broadcast signals and push them to cloud-based or on-premise streaming servers. The encoder handles the heavy lifting of compression and protocol conversion, feeding into platforms that then distribute to web, mobile, and Smart TV apps.
H3: Corporate and Enterprise TV Networks
Large enterprises use IPTV to distribute live CEO broadcasts, training videos, and news channels across office buildings and campuses. PVI encoders enable these organizations to broadcast professional-quality video over their existing IP infrastructure without laying new cables.
H3: Stadium and Sports Venue Broadcasting
Sports venues use IPTV to deliver live game footage, replays, and sponsor content to screens throughout the facility — concourses, luxury suites, locker rooms, and press areas. Low-latency encoding is critical here so screens stay synchronized with the action happening live on the field.
H3: Education and University Campuses
Universities deploy IPTV encoder setups to distribute live lecture streams, campus TV channels, and event broadcasts to classrooms, dormitories, and study halls across campus — all over the existing campus network.
H3: IPTV Headend for Service Providers
Telecommunications companies and IPTV service providers use banks of PVI encoders in centralized IPTV headend setups to encode dozens or hundreds of channels, feed them into middleware platforms, and distribute them to subscribers across a city or region.
H2: PVI Encoder vs. Other IPTV Encoders — Comparison Table
How does a PVI encoder IPTV device stack up against other popular encoder brands and solutions?
| Feature | PVI Encoder | Haivision | Ateme | Amino | Generic IP Encoder |
|---|---|---|---|---|---|
| Multi-channel encoding | Yes (4–32 ch) | Yes | Yes | Limited | Limited (1–4 ch) |
| H.265/HEVC support | Yes | Yes | Yes | Partial | Some models |
| Low-latency mode | Yes | Yes (SRT) | Yes | No | Rarely |
| Web-based management | Yes | Yes | Yes | Yes | Basic |
| SNMP monitoring | Yes | Yes | Yes | Yes | Rarely |
| Hardware redundancy | Yes (dual PSU) | Yes | Yes | No | No |
| Price range | Mid-range | Premium | Premium | Mid-range | Budget |
| Ideal for | IPTV headend, hotels, OTT | Enterprise, broadcast | Broadcast networks | Small IPTV | Home/small office |
| 24/7 reliability rating | High | Very High | Very High | Medium | Low–Medium |
| Setup complexity | Moderate | Complex | Complex | Easy | Easy |
Verdict: PVI encoders occupy a strong mid-tier position — offering professional-grade features and reliability without the premium price tag of Haivision or Ateme. For hotel IPTV, small OTT operators, and enterprise deployments, they represent an excellent value-to-performance ratio.
H2: Common Issues and Troubleshooting Your PVI Encoder IPTV Setup
Even the best hardware encounters problems. Here are the most common issues in video encoding IPTV deployments and how to resolve them:
H3: Issue 1 — No Video on Output Stream
Symptoms: Stream is active but shows a black screen or no signal.
Causes and fixes:
- Check that the input cable is securely connected and the source device is powered on and outputting signal.
- Verify the input type in the encoder settings matches the actual cable type (HDMI vs SDI).
- Confirm the input resolution in settings matches what the source is outputting.
- Try a different input cable or port.
H3: Issue 2 — Audio Out of Sync
Symptoms: Video and audio are misaligned by a consistent delay.
Causes and fixes:
- Adjust the audio delay compensation setting in the encoder — most devices allow ±500 ms adjustment.
- Check if your source device introduces processing delay (some TV receivers have internal processing latency).
- Ensure audio sample rate in encoder settings matches the source (48 kHz for broadcast).
H3: Issue 3 — Stream Not Reaching Viewers on the Network
Symptoms: Encoder shows active output but VLC or set-top boxes can’t receive the stream.
Causes and fixes:
- Verify IGMP snooping is properly configured on your network switch — multicast streams require it.
- Check that no firewall rules are blocking UDP traffic on your streaming ports.
- Confirm the multicast IP address you’re streaming to is correctly entered in VLC or middleware.
- Check TTL values — if TTL is set too low, packets may not cross routers to reach all devices.
- Try switching to unicast temporarily to isolate whether the issue is multicast-specific.
H3: Issue 4 — Poor Video Quality or Blocking Artifacts
Symptoms: Pixelation, blocking, or blurriness especially during fast motion.
Causes and fixes:
- Increase the video bitrate — for HD content with fast motion, 6–8 Mbps is recommended.
- Reduce the GOP size — a large GOP increases compression but hurts quality during motion.
- Switch from VBR to CBR if you’re on a managed network — it provides more consistent quality.
- Check that your CPU/processor utilization isn’t hitting limits (for software encoders).
H3: Issue 5 — Encoder Web Interface Not Accessible
Symptoms: Can’t reach the encoder’s IP address in a browser.
Causes and fixes:
- Confirm your computer is on the same subnet as the encoder.
- Try pinging the encoder’s IP — if there’s no response, check network cables and switch ports.
- Perform a factory reset (hold reset button for 10–15 seconds) if the IP address has been changed and lost.
- Check if the encoder is in bridge or DHCP mode and discover its assigned IP using your router’s DHCP client list.
H3: Issue 6 — High CPU / Dropped Frames (Software Encoders)
Symptoms: Frame drops, stuttering, or encoder warnings about processing overload.
Causes and fixes:
- For hardware encoders, this typically indicates a thermal issue — check ventilation and fan operation.
- Reduce the number of simultaneous encode channels if near capacity.
- Lower resolution or bitrate settings temporarily to relieve load.
- Ensure firmware is up to date — performance optimizations are common in encoder firmware updates.
H2: Best Practices for PVI Encoder IPTV Deployments
Follow these expert-level recommendations to get maximum performance and reliability from your IPTV broadcasting encoder:
Network best practices:
- Always use gigabit switches with IGMP snooping enabled for multicast deployments.
- Separate streaming traffic onto a dedicated VLAN to prevent bandwidth competition.
- Use QoS (Quality of Service) policies on your switches to prioritize streaming UDP packets.
- Plan multicast address allocation carefully and document every address assignment.
Encoder configuration best practices:
- Set a static IP on every encoder — never rely on DHCP for production streaming equipment.
- Use NTP (Network Time Protocol) sync on all encoders for consistent timestamping.
- Enable SNMP monitoring and connect encoders to your network management system.
- Schedule regular configuration backups — export encoder settings after every change.
- Keep firmware updated — manufacturers regularly release stability and performance patches.
Operational best practices:
- Run a 24-hour burn-in test on new hardware before deploying to production.
- Label every encoder input and output in your documentation system.
- Set up email or SMS alerts for stream failures using SNMP traps or middleware monitoring.
- Perform a quarterly review of encoding parameters — content and network conditions change over time.
H2: Frequently Asked Questions — PVI Encoder IPTV
H3: What is the difference between a hardware IPTV encoder and a software encoder?
A hardware IPTV encoder like a PVI encoder uses dedicated silicon chips (ASICs or FPGAs) specifically designed for video compression, making it far more efficient, reliable, and capable of 24/7 operation than software encoders running on general-purpose CPUs. Software encoders are more flexible and cost less upfront but consume significant CPU resources, generate heat, and are less reliable for continuous operation.
H3: What video codecs does a PVI encoder support?
Most PVI encoder IPTV devices support H.264 (AVC), H.265 (HEVC), and MPEG-2 for video encoding, along with audio codecs including AAC, MP3, and AC3/Dolby Digital. H.264 is recommended for most deployments; H.265 is ideal when you need to reduce bandwidth by up to 50% for HD and 4K content.
H3: How many channels can a PVI encoder handle simultaneously?
This depends on the specific model. Entry-level PVI units typically encode 1–4 channels simultaneously, while rack-mounted professional units can handle 8, 16, or 32 channels in a single device. For large headend setups, multiple encoders are deployed in parallel.
H3: What bitrate should I use for HD IPTV streaming?
For 1080p HD IPTV using H.264, a bitrate of 4–8 Mbps is recommended for standard programming, with up to 10–12 Mbps for sports or high-motion content. With H.265, you can achieve equivalent quality at roughly half those bitrates — 2–4 Mbps for 1080p.
H3: Can I use a PVI encoder for OTT streaming to the internet?
Yes. PVI encoders support output protocols like HLS, RTMP, and RTSP that are compatible with cloud streaming platforms and CDN delivery. You would connect the encoder’s output to a streaming server or directly to a CDN ingest point for internet-based OTT distribution.
H3: What is IPTV headend setup and where does the encoder fit?
An IPTV headend setup is the collection of equipment at the origination point of an IPTV system — where signals are received, processed, encoded, and prepared for distribution. The encoder is the first major processing stage, converting raw video signals into compressed IP streams that are then managed by middleware and distributed to subscribers.
H3: How do I access the PVI encoder management interface?
Connect the encoder to your network and navigate to its IP address in a web browser (e.g., http://192.168.1.100). Most PVI encoders ship with a default static IP printed on the device or in the manual. Log in with the default credentials and configure from there. Always change the default password immediately after first login.
H3: What causes buffering in IPTV streams from an encoder?
The most common causes include insufficient network bandwidth, misconfigured multicast/IGMP settings, an overloaded encoder, high packet loss on the network, or an undersized jitter buffer on the client side. Check encoder bitrate settings first, then network utilization, then switch configuration.
H2: People Also Ask — PVI Encoder IPTV
Q: What is a PVI encoder used for in IPTV? A PVI encoder is used to compress live video signals into IP-compatible transport streams for distribution across IPTV networks — enabling delivery of live TV channels to set-top boxes, smart TVs, and streaming devices over LAN or internet connections.
Q: Is PVI encoder compatible with all IPTV middleware platforms? Most PVI encoders output standard MPEG-TS over UDP/RTP, which is compatible with virtually all professional IPTV middleware platforms including Ministra, Stalker, Xtream Codes API-compatible systems, and custom headend solutions.
Q: How do I reduce latency in PVI encoder IPTV streaming? Enable low-latency encoding mode if available, reduce GOP size, switch to UDP multicast output, and ensure your network has minimal packet loss and adequate bandwidth. Sub-second latency is achievable on a well-optimized LAN setup.
Q: Can PVI encoders handle 4K streaming? Higher-end PVI encoder models with H.265 support can handle 4K UHD encoding. However, 4K IPTV requires significant network bandwidth (typically 15–25 Mbps per channel) and compatible 4K-capable set-top boxes or displays.
H2: 5 SEO-Friendly Blog Title Suggestions
- PVI Encoder IPTV: Complete Guide, Setup, Benefits & Best Practices
- How to Set Up a PVI Encoder for IPTV Streaming (Step-by-Step)
- PVI Encoder IPTV Review: Features, Use Cases & Expert Setup Tips
- Best IPTV Hardware Encoder 2025: Why PVI Encoder Tops the List
- PVI Encoder IPTV Setup Guide: From Headend to Screen in Minutes
H2: Image Ideas with ALT Text
Image 1 — System Diagram Description: A flowchart showing the full IPTV signal chain from video source → PVI encoder → IP network → middleware → end-user device. ALT text: PVI encoder IPTV signal chain diagram showing video source to set-top box delivery
Image 2 — Encoder Web Interface Screenshot Description: Screenshot of a typical PVI encoder web management dashboard showing encoding parameters, stream status, and bitrate monitoring. ALT text: PVI encoder IPTV web management interface with encoding settings and stream status
Image 3 — Rack-Mounted Headend Setup Description: Photo of a professional IPTV headend rack with multiple PVI encoders, switches, and servers installed. ALT text: Professional IPTV headend setup with rack-mounted PVI encoders for multi-channel broadcasting
H2: Internal Linking Suggestions
- “Complete IPTV Headend Setup Guide” — link to your IPTV infrastructure overview article
- “Best IPTV Middleware Platforms Compared” — link to middleware comparison article
- “How to Configure IGMP Snooping for IPTV Multicast” — link to network configuration guide
- “H.264 vs H.265 for IPTV Streaming — Which Codec Should You Choose?” — link to codec comparison
- “IPTV Set-Top Box Setup Guide for Beginners” — link to STB configuration article
Conclusion: Build a Bulletproof IPTV System with the Right Encoder
Your IPTV system’s performance starts and ends with the quality of your encoder. A well-configured PVI encoder IPTV deployment gives you broadcast-grade video quality, rock-solid reliability for 24/7 operation, multi-channel efficiency that scales with your business, and the flexibility to support any delivery protocol your platform requires.
From hotel TV systems serving hundreds of guest rooms to OTT platforms delivering content to thousands of subscribers, PVI encoders have proven themselves as a dependable foundation for professional IPTV infrastructure.
Now that you have the complete picture — how they work, how to set them up, and how to troubleshoot them — you’re equipped to build or upgrade your IPTV headend with confidence.
Ready to take the next step? Explore our detailed IPTV headend setup guide to design your complete system architecture, or check out our comparison of the best IPTV middleware platforms to find the right management layer for your PVI encoder deployment.
Have questions about your specific IPTV setup? Drop them in the comments below — our team of IPTV specialists responds to every question.
Thanks for breaking down the role of PVI encoders in IPTV — it’s easy to overlook how critical reliable encoding is for smooth, high-quality streaming. Your emphasis on the encoder as the backbone of any IPTV system really highlights why proper setup and configuration can make or break a deployment. This guide offers practical insights that anyone building or scaling an IPTV headend should keep in mind.
I really appreciate the focus on the hardware layer; it’s easy to get caught up in the software side of IPTV, but if the initial conversion isn’t rock solid, no amount of bandwidth will fix the resulting jitter. This is such a critical point for anyone attempting to scale a professional headend.